You’ve seen Singapore interiors that stop you mid-scroll—rooms that feel expensive, spacious, and perfectly lit. They don’t happen by accident. Behind every polished shot is a precise set of decisions about light, staging, lenses, and post-processing that most people never consider. These aren’t guarded trade secrets, but they’re not obvious either. What Singapore’s best interior photographers actually do might surprise you.
Light Control Methods Singapore’s Interior Photographers Rely On
Because Singapore’s equatorial light is both intense and unpredictable, controlling it is the first skill serious interior photographers master here. You’ll diffuse harsh midday glare using blackout curtains, bounce fill light off white foam boards, and shoot during the golden hour window. Every experienced Singapore interior photographer layers natural and artificial light deliberately, never leaving exposure to chance.

Staging Tricks Interior Photographers Use to Make Spaces Shoot Bigger
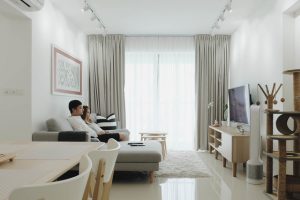
Singapore’s compact HDB flats and shoebox condos push interior photographers to master the art of making tight spaces read larger on camera. You’ll remove excess furniture, align décor along diagonal sightlines, and push pieces flush against walls. Mirrors double perceived depth, while low camera angles exaggerate ceiling height. Every object you keep earns its place — clutter collapses square footage instantly.
Camera Angles and Lenses That Define Singapore Interior Photography
Once your staging is locked in, the lens and camera position you choose will either reinforce that illusion of space or undo it entirely. Singapore’s compact interiors demand a 16–24mm full-frame lens. Shoot from corner positions at roughly 1.2 metres high to capture ceiling height and depth simultaneously. Avoid fisheye distortion—local property buyers immediately recognise it and it signals amateur work.
Post-Processing Techniques That Give Singapore Interior Photos a Magazine Finish
Even the sharpest RAW file from a well-staged HDB or condo shoot needs deliberate post-processing before it reads as magazine-ready. You’ll correct mixed lighting from Singapore’s common fluorescent-and-daylight combinations first, then lift shadows without blowing highlights. Apply targeted HSL adjustments to neutralize yellow wall casts, sharpen architectural lines selectively, and use masking to balance window exposure against darker interior corners.